4th of July Make Ahead S'mores

No fire required, less mess with the kids and you can make ahead… it’s a total 4th of July win!

Ingredients:

1 can (14 ounces) Eagle Brand Sweetened Condensed Milk

1 cup (or more as desired) of mini marshmallows.

1 bag of dark or semisweet chocolate chips.

24 whole graham crackers broken in half

Assorted sprinkles

24 wooden or paper pop sticks (optional)

Notes:

  • I liked keeping some of them whole so just add some a little later once the chocolate cools (but is still pliable) and won’t melt the mini marshmallows.

  • Remember, sweetened condensed milk is well, sweet so I think adding a dark or at least a semi-sweet chocolate chip is best here.

  • Some of the graham crackers will break, eat them anyway :)

  • These are very rich so don’t overstuff (unless you want to). Just add mixture according to your level of preferred sweetness!

Directions:

In a small microwave-safe bowl, microwave 2/3 cup milk on high for 1-1/2 minutes. Add marshmallows and 1 cup chips; stir until combined. Drop by spoonfuls onto 24 graham cracker halves; spread evenly. Top with remaining graham cracker halves; press down gently.

Loaded Hummus

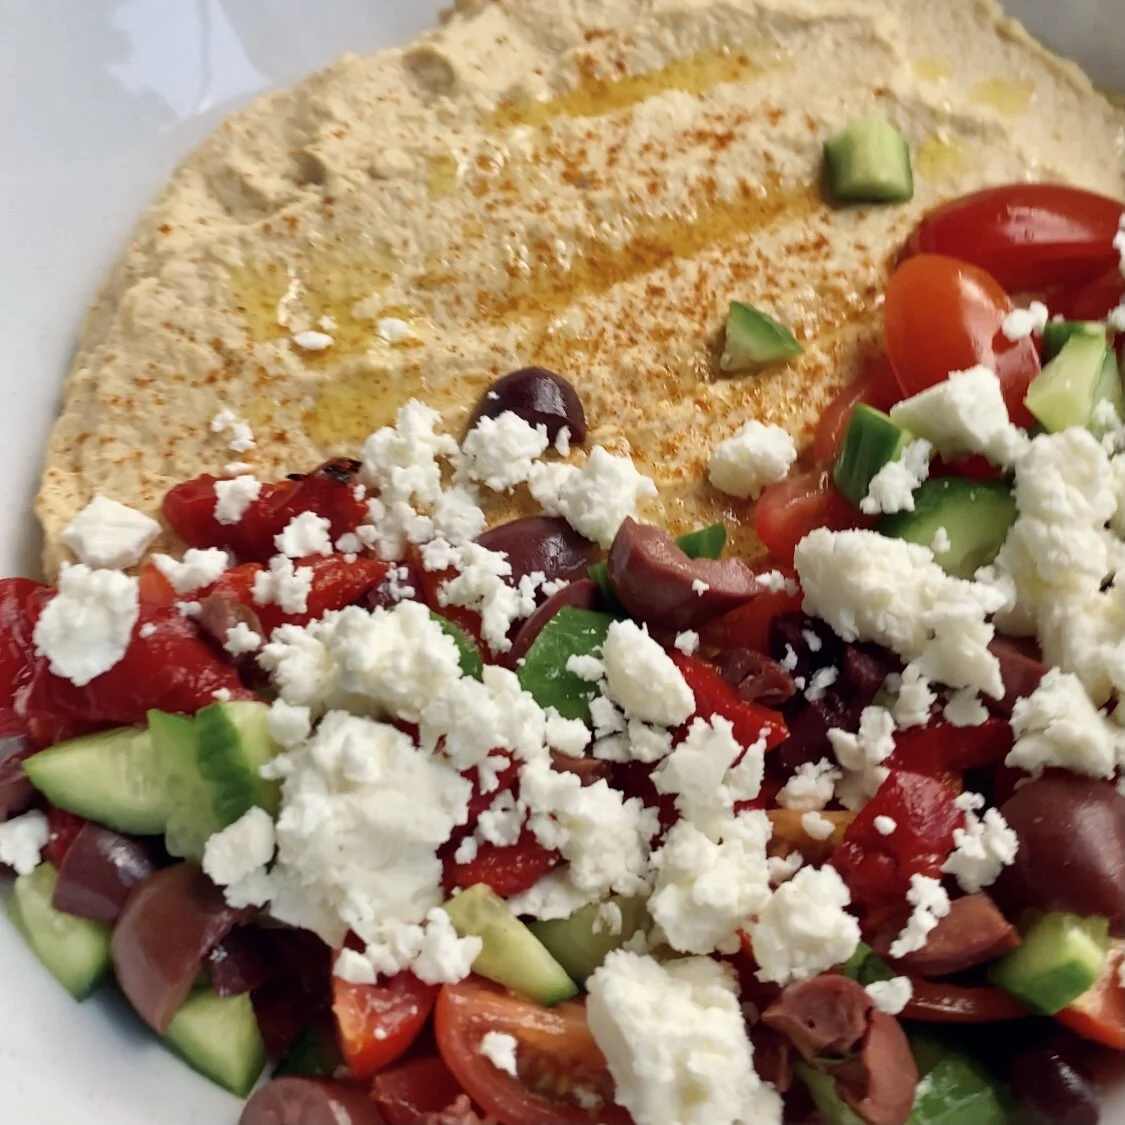
Beautiful to look at and delicious to eat makes this loaded hummus literally, the perfect dish.

Prep time: 15 minutes or less
Note: You can also make two days in advance

Ingredients:

2 (15 oz) cans of chickpea, drained and rinsed

1/3 c. tahini (often found in international aisle of grocery stores)

1/4 cup of ice water (use the cubes too)

2 large or 4 small cloves of garlic

Fresh lemon juice to taste (for me, it’s about 1/3 cup) plus more for serving

1/2 cup crumbled feta cheese

3 tbsp extra-virgin olive oil, plus more for drizzling

Fresh Italian Flat-Leaf Parsley (as preferred but I usually use at least 3 tablespoons)

Kosher or sea salt and freshly ground black pepper to taste (for me a teaspoon of salt, 1/4 teaspoon of garlic salt and 1/2 teaspoon of black pepper but taste it as you go and season accordingly).

Paprika (1/2 teaspoon to blend and more for sprinkling as a finish)

1/2 cup of the following: English cucumber, tomatoes pitted and chopped Kalamata olives, parsley and feta.

Directions:

in a food processor, combine chickpeas, tahini, ice water, garlic, lemon juice, olive oil, paprika, salt, garlic salt and pepper and blend until smooth.

Add hummus to a serving dish, sprinkle paprika, add cucumbers, tomatoes, olives, feta, parsley, a drizzle of oil oil and a little salt and pepper if desired on the salad topping.

Enjoy with warm Naan bread and veggies!

Breaded Artichoke Hearts

I had 10 minutes before the cook-off started that I wasn’t prepared for because I thought it was the next day! The only requirement was that I cook with artichokes. After a brief panic, I called my mom and of course, she knew exactly what I should make and now, it’s my new favorite! You won’t believe how delicious and easy this restaurant-quality artichoke appetizer is! So impressive!

Using quartered and canned artichokes make this restaurant-quality appetizer so easy!

Using quartered and canned artichokes make this restaurant-quality appetizer so easy!

WHAT YOU'LL NEED:

  • 1 can of artichokes (halved or quartered)

  • 2 eggs

  • Italian Parsley, 1/2 cup finely chopped

  • 2 cups of Italian-Style Panko Breadcrumbs

  • Pecorino-Romano, lemon juice, lemon zest and garlic salt to taste

  • Olive Oil for sauteing

HOW TO:

  • Chop Parsley and if desired, zest a little lemon and set aside

  • Lay artichokes out in a flat layer and pat dry with paper towel

  • In a dredging dish, add raw scrambled eggs and parsley

  • Place breadcrumbs in a dredging dish

  • Dip artichoke hearts in egg wash and then the breadcrumbs

  • Air Fry at 360 for 8 mins (time varies) or sauté in olive oil until golden brown

  • As soon as you remove from heat, rest them on paper towel to blot excess oil and sprinkle lightly with garlic salt

  • Finish with a little lemon juice, zest, parsley & Pecorino Romano cheese

Chic-fil-A Copycat Sandwich

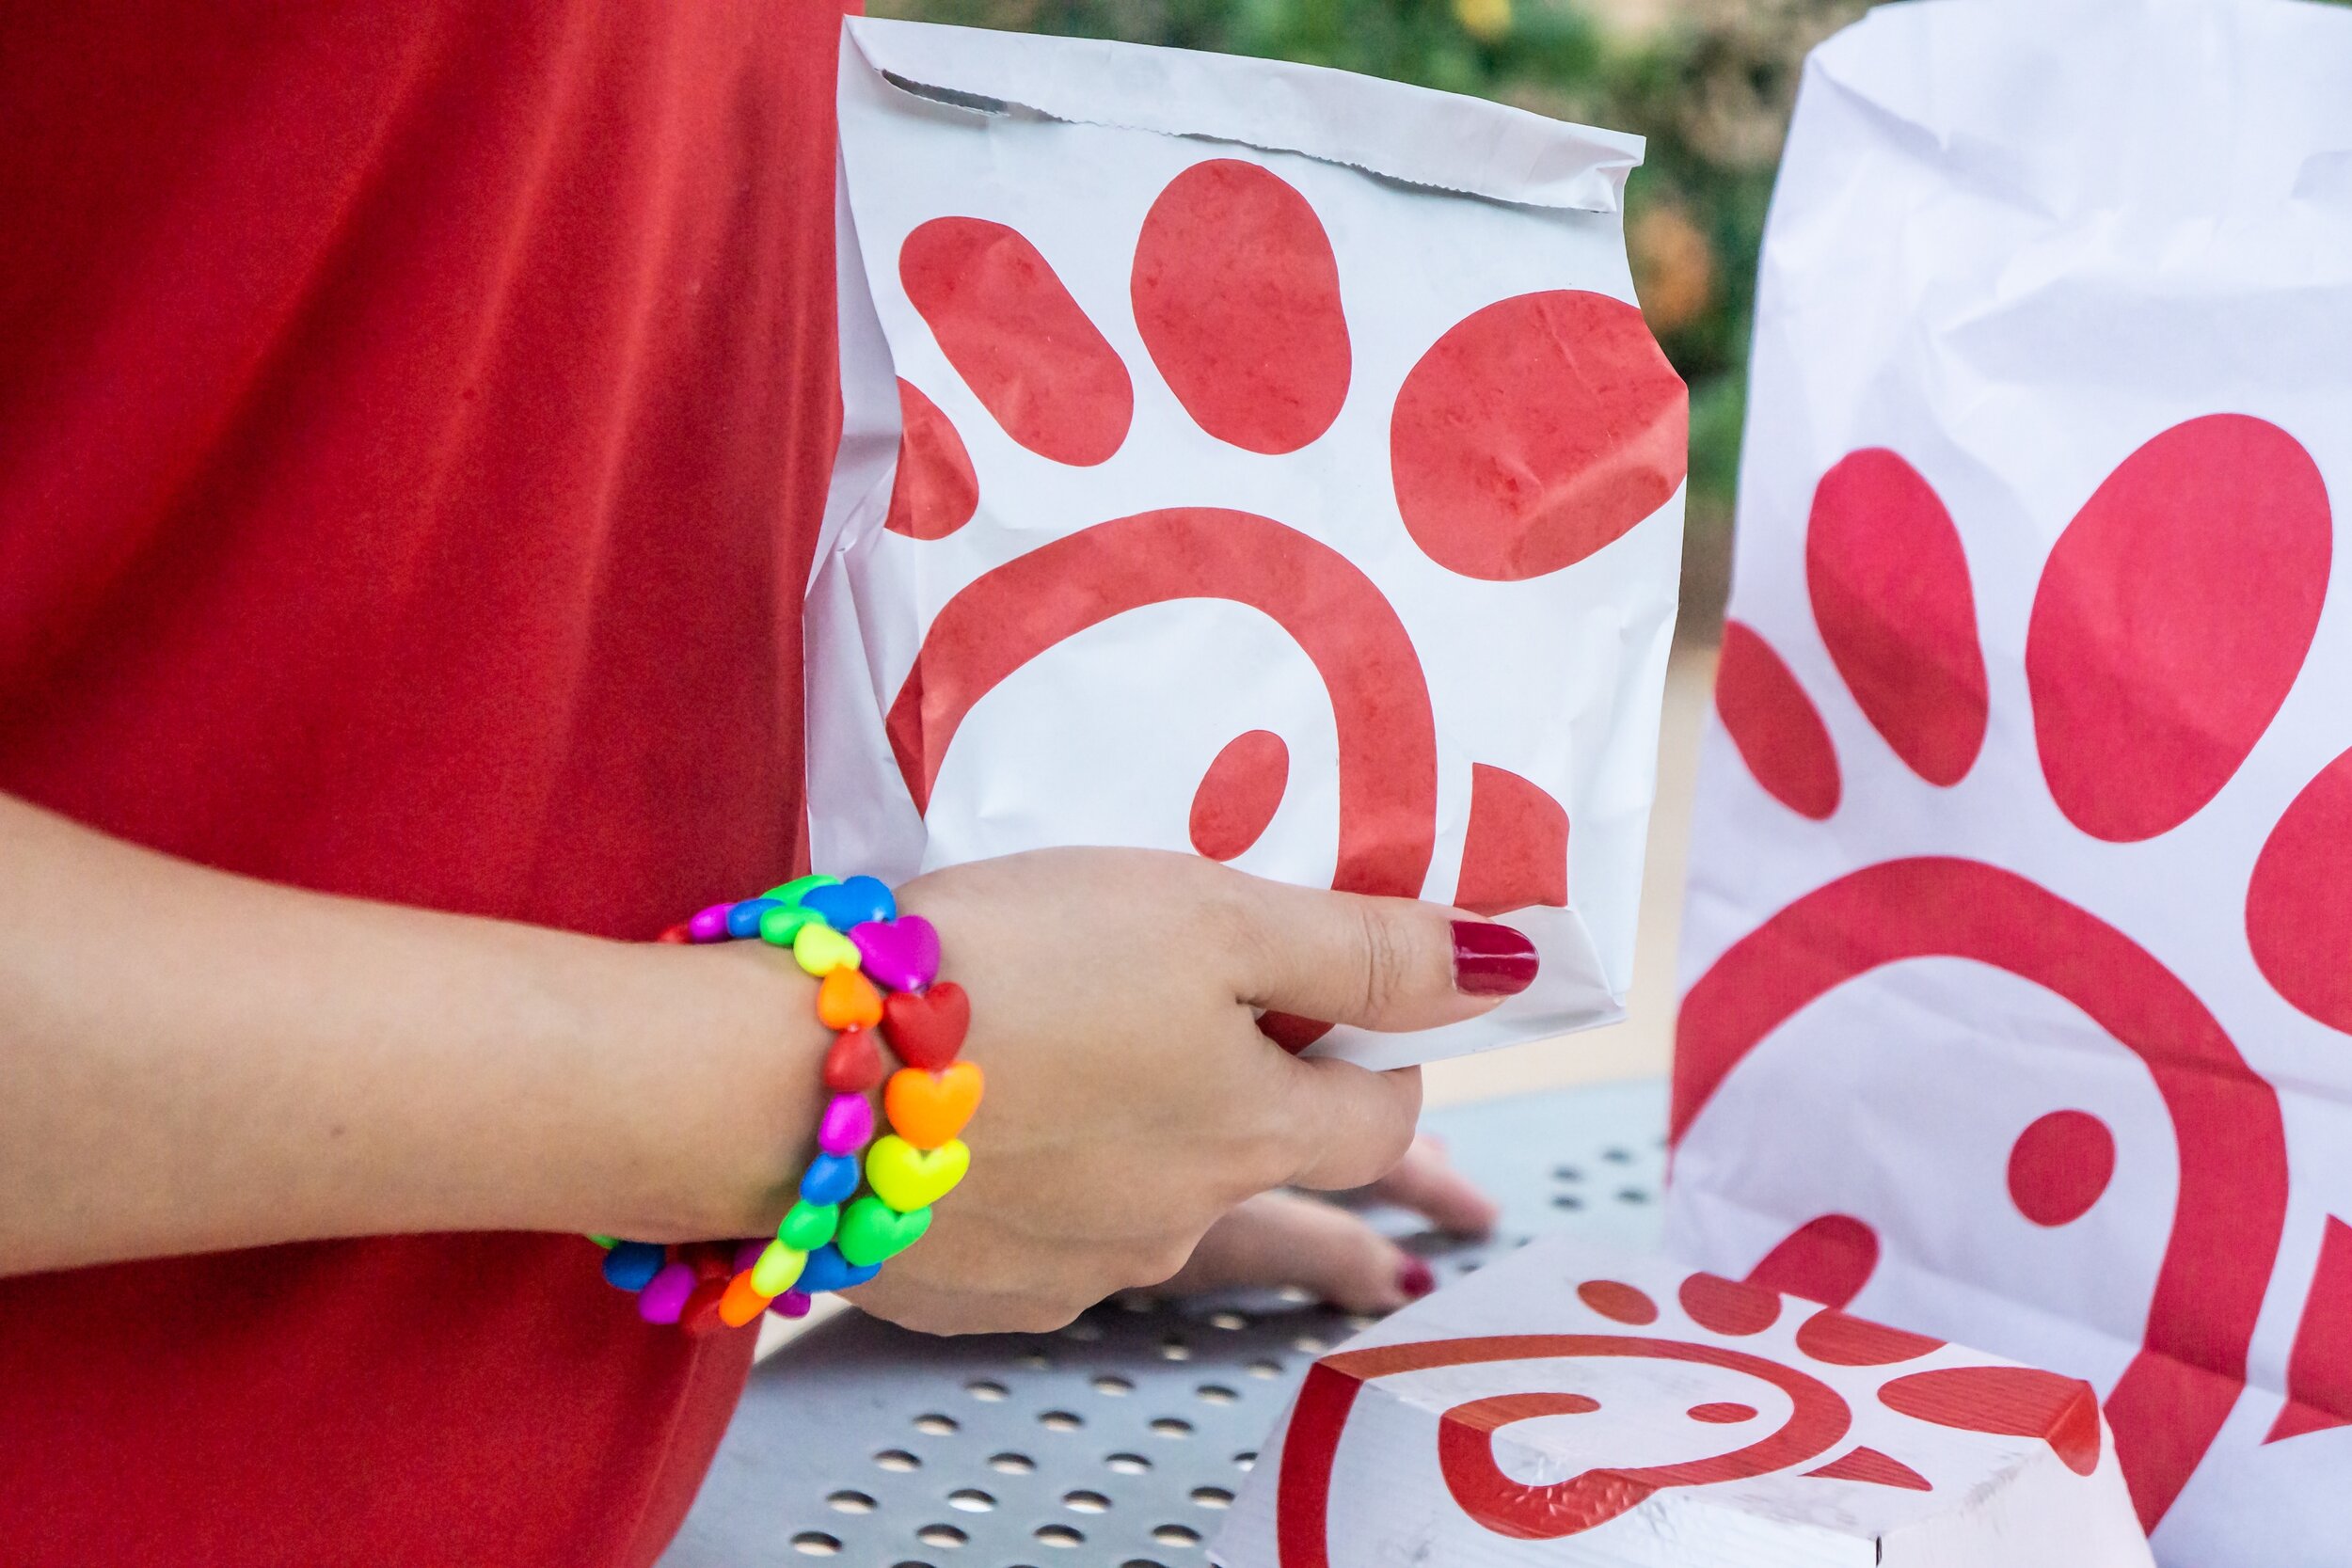
I know I can’t be the only one late to the game on this “Red Bag Chicken.” This Chic-fil-A copycat has a dedicated cult-like following of over 20,000 members on Facebook. Fans are so serious about this chicken, you have to tell them how you heard about the group (founded by an enthusiast) and how much you paid for the coveted red bag of chicken.

I think you’ll agree that not only is it cheaper than the original sandwich, it tastes so close to the Chic-fil-A classic, even if you don’t join their Facebook fan page, you might understand why they have one.

If the original sandwich is a 10, I give the Aldi copycat version an 8.5-9.0. Some of you might even think it’s the perfect 10.

Oh! And here are the buns that the staff and fans say make it so convincing:

IMG_9022.jpeg

Specially Selected Brioche Buns from Aldi

$3.49

Here are my tips on how to prepare:

  1. Buy the chicken. If you’re having trouble finding it, ask the store what day they restock and get there early.

  2. Buy the Brioche buns at Aldi too, they’re 3.49 for 6. The can of pickles was under $2.00 so all in for 6 sandwiches, you’re paying around $1.80 per sandwich versus $3.05 at Chic-fil-A.

  3. I think adding sauce (either hot or store bought Chic-fil-A sauce was a good thing. I found the Chic-fil-A sauce at Kroger for $3.99.

  4. The package says to bake the fillets for 20 minutes. Time varies by oven so just make sure it’s thoroughly heated.

  5. Butter and toast your brioche rolls. You can also use hamburger rolls but depending on your bum of choice, it might not taste as close to the original as the Brioche buns at Aldi.

  6. Once the chicken is hot and the buns are golden brown, steam the sandwich either in a pan with a few droplets of water for 5-10 seconds ONLY or by wrapping it in a damp paper towel and microwaving it for :20.

  7. Let me know what you think! Follow me on Instagram @tammiweed or on TikTok @girlsgottoeat

Panera's Copycat Broccoli Cheddar Mac & Cheese

IMG_8563.jpeg

Panera Copycat Broccoli Cheddar Mac & Cheese?

Ditch the soup, we’re making Mac & Cheese!

I’ll be honest, this was incredibly delicious (like savor every bite good) but because it requires more time and effort than I usually put into weeknight cooking and because it’s so very decadent, this is more of a special occasion dinner dish for me.

Also, if there’s someone in your life you enjoy cooking with, enlist their help with this recipe. My sister Kristine and I tag teamed this one and together, we were able to prep this in at least half the time it would have taken me alone.

Having said all that, if you like homemade Mac & Cheese chances are, you just found your new favorite recipe!

IMG_8564.jpeg

The macaroni:

3/4 pound of pasta. Use whatever pasta shape you like. Panera uses small shells but I used Cavatappi.

The veggies:

  • 1/2 stick of butter (you’ll need between 1.2 stick and 1.5 for the entire recipe)

  • 3 tablespoons of Extra Virgin Olive Oil

  • 1/2 tsp garlic salt

  • salt and pepper to taste

  • 1/2 cup diced sweet onion (Vidalia if available)

  • 1 cup shredded carrots (if you wanted a shortcut, I think you could use matchstick carrots)

  • 3 cups broccoli florets, chopped

IMG_8567.jpeg

The Cheese Sauce...

  • 1/2 stick of butter

  • 1/4 cup flour

  • 2 1/2 cups of half & half (you can also use 1 1/2 cups of whole milk or 2% and 1 cup of heavy cream)

  • 1/2 cup chicken broth (I used low sodium)

  • 1/2 tsp white pepper (black pepper is fine to use too)

  • 1/2 tsp garlic salt

  • 1/2 tsp dry mustard spice -or- dijon mustard

  • 1 tsp onion powder

  • 1 cup of grated extra sharp white cheddar cheese

  • 1 cup sharp yellow or orange cheddar cheese shredded

  • 1 cup of Velveeta cheese sauce. I used two 4 ounce pouches.

Note: I understand if the inclusion of Velveeta disturbs you. Somehow despite my standards for high quality food, I’ve made my peace with the occasional use of it but if you can’t ever fathom the thought, substitute with 3/4 cup of shredded Colby-Jack and 1/4 cup of cream cheese. I’m going to try that option next time!

IMG_8565.jpeg

Breadcrumb Top

1 cup of Panko or regular breadcrumbs, mixed with 2-3 tablespoons of melted butter and 1/4 cup of Pecorino or Parmesan. The cheese is optional.

Directions:

  • Generously butter a shallow 2-quart baking dish.

  • Add 3 tablespoons of olive oil and melt 4 tablespoons of butter in a dutch oven or a pan deep enough to cook your vegetables. On medium heat, add onions tp pot, sprinkle a pinch of salt on them and let simmer for 2-3 minutes.

  • Add broccoli and carrots.

  • Season veggies with garlic salt, stir and taste. If the veggies need a little more salt, add a pinch at a time of regular salt.

  • We want the veggies to soften but remember, they’ll cook a second time in the oven so once tender, remove from heat and set aside. This whole process should take about 10 minutes. Put the lid on the veggies for at least half of the time for a quicker cook.

  • Cook the macaroni in a large pot of boiling salted water until al dente.

  • Meanwhile, in a separate skillet deep enough to hold your cheese sauce, melt 1/2 stick of butter.

  • Add the flour and cook over moderate heat for 2 minutes, stirring constantly.

  • Add some of the half-and-half and then some of the chicken stock and continue to stir over moderate heat until all are incorporated and thickened, about 3-5 minutes.

  • Reduce heat to low and add the cheeses stirring until melted.

  • Stir in the garlic salt, pepper, mustard, onion powder. Taste the sauce and season with salt and pepper tp taste if needed.

  • Remove the pasta. Drain well.

  • Gently fold your cooked vegetables in with your pasta.

  • You can now add the cheese sauce to the pasta pot and fold gently until well combined or you can start with a layer of cheese in your baking dish add your pasta and veggies and repeat your layers. Either method works.

  • Once your cheesy pasta is in the greased baking dish, melt butter for breadcrumbs in a microwaveable bowl. Once melted, remove from the microwave, combine the butter with the breadcrumbs and sprinkle on top of your pasta. If you’re making this dish the day prior, skip this step and wait until the day of to add your breadcrumbs.

  • Place macaroni and cheese into a preheated 350 degree oven and cook until golden brown on top (usually 45 minutes but varies with different ovens).

  • Let sit 10 minutes before serving and enjoy!

IMG_8561.jpeg

Worth the effort!

Classic Italian Sub

IMG_8542.jpeg

Dressing 

• Extra Virgin Olive Oil, 1/2 cup

• Red wine vinegar, 2 tablespoons and 2 teaspoons or to taste 

• Garlic salt, 1/2 teaspoon or to taste 

• Italian seasoning or even just dried oregano, 1 teaspoon or to taste

Sandwich 

• Loaf of bread 12-26 inches or anywhere in between 

• 1//4 pound of Salami (I prefer Genoa) 

• 1/4 pound of sandwich size pepperoni

• 1/2 pound of spicy ham or Capicola 

• 1/2 non-smoked provolone 

• Lettuce 

• Tomato

• Onion

• Pickled or spicy peppers such as banana pepper rings, peperoncini rings or other

Add dressing and layer lettuce, tomato, onion, peppers, meat and cheese. Enjoy!

IMG_8543.jpeg

Perfect Deviled Eggs

Eggs.JPG

Truth be told, my distaste for mayonnaise won’t allow me to eat Deviled Eggs but I still love to garnish them with chives and bacon and put them on display as part of a beautiful Easter brunch. Here’s the only recipe my family uses, enjoy!

Classic Deviled Eggs

Ingredients:

6 large eggs

1/4 cup of mayonnaise

1 teaspoon of sweet pickle juice (it’s both sweet and acidic)

1 tablespoon of Dijon

For topping/garnish: Paprika, Bacon (I prefer uncured) and thinly sliced chives or scallions

Combine eggs, mayonnaise, pickle juice, mustard in a food processor. Salt and pepper to taste. Spoon filling (or pipe filling using a ziploc bag with a corner cut-off) into egg-white half. Sprinkle with paprika, add bacon and finish with chives.

.

Nabisco’s Famous Chocolate Wafer Icebox Cake aka Zebra Cake

IMG_7540.jpeg

INGREDIENTS:

I’m not a fan of Cool Whip so I always make the traditional recipe with homemade whipped cream but you can do either!

  • 1 ½ cups heavy whipping cream

  • 2 tablespoons confectioners' sugar

  • 2 teaspoons vanilla extract

  • 1 (9 ounce) package Nabisco chocolate wafer cookies Pro Tip: These wafers can usually be found in your local grocery store with the ice cream toppings or on the top shelf of the cookie aisle.

  • ¼ cup grated chocolate or dust with cocoa powder (both optional)

DIRECTIONS:

Pro Tip: Chill your bowl in the freezer before making homemade whipped cream.

  • Beat cream in a large glass or metal mixing bowl with an electric mixer.

  • Gradually add vanilla and confectioners' sugar and continue to to beat until the cream holds stiff peaks. Lift your beater or whisk straight up:the whipped cream should form a sharp peak that holds its shape.

  • On a serving dish or platter, place a generous dollop of cream using a piping bag, spoon or any type of spreader. Top with a wafer and repeat. I normally do this 4 more times but there are no rules here as long as your wafer stacks don’t topple over.

  • Dust with cocoa powder and/or a sprinkling of chocolate curls if desired. This cake is perfectly delicious without garnishing so no worries if you opt out on this step.

  • Cover loosely and refrigerate at least 4 hours but most recommend overnight. I think anywhere in between is just fine!

  • NOTE: I prefer stacking the wafers upright and using a piping bag to layer the cream in between because it’s so quick but traditionally, a spoon, knife or any type of spreader is used to layer the cream and stacks of wafers with cream are pieced together to form a log. Do whatever works for you. If you do form a log, the suggestion for serving is to slice it on the diagonal to showcase the layers.

IMG_7541.jpeg

Mini Cinnamon Biscuits

IMG_6809.jpeg

I wasn’t expecting for these biscuits that my mom has been making for years to take off like they did but as I write this, the recipe video for these delightful bites has been viewed over 1.5 million times and more than 18,000 people have shared it! They’re easy, impressive and of course, delicious! Enjoy!

Cut buttermilk biscuits into 4 pcs. Arrange on butter-greased pan. Spread soft butter over the biscuits. Sprinkle cinnamon sugar and bake 350 til golden (usually around 15 minutes but might be more depending on your oven). It’s very important that your biscuit is thoroughly done baking before the icing is drizzled..

Icing: 1.5c confectioners sugar. Slowly add half & half. About a 1/4 cup but may need more or less. Once you have the icing consistency desired and as seen in the video, microwave 30 seconds and drizzle over hot biscuits. Enjoy!

My Favorite Dinner - Chicken, Potatoes, Sausage and Peppers

IMG_7119.jpg

My mom started making this when I was a kid and i still eat this or a version of it once a week! She added the sausage because my Dad would get tired of eating chicken. It’s quick, comforting and healthy!

Roughly chop 1/2 cup of Italian-flat leaf parsley.

Cut two medium-sized potatoes into 8 pieces each. Season with olive oil, salt, pepper and garlic powder or garlic salt and Montreal Steak Seasoning. Season to taste.

Season two chicken breasts the same way.

Cut 1 bell pepper into roughly the same size as the potatoes.

Take two sausage links and cut in three pieces each.

In a medium hot skillet, add 1 tbsp each of olive oil and butter.

Once butter has melted, add 2 chopped garlic gloves.

Add sausage and then chicken. Cover pan. Once brown on bottom, flip chicken and add potatoes, pepper and chopped parsley. Reduce to low heat. Cover and cook for 15-20 mins or until meat is thoroughly cooked.

Lobster Rolls - Connecticut Style

Lobster rolls at home are not only delicious and easy-to-do but they’re so much cheaper too! My family is obsessed!

IMG_6216.jpeg

INGREDIENTS:

• Lobster meat - Traditionally, you would want both claw meat and lobster tail meat in your roll but because lobster tails are available almost everywhere and easier to work with, sometimes I just use tail meat. Up tp you!

• Top Sliced Buns - Top sliced buns are easy to find at any local grocer while New England Hot Dog Buns might be a little harder to come by depending on where you live. If you’re so lucky, butter all sides of your rolls and pan fry until golden brown.

• Butter - People have strong opinions when it comes to using clarified butter (butter without the milk solids) rather than regular butter but I’ve used both and both are delicious!

• Old Bay Seasoning - Use sparingly to start and add more if needed but I find just a light sprinkle is a perfect finish!

• Fresh Chives - I took a survey and my family of taste testers all thought fresh chives elevated the roll so I highly recommend.

• Fresh Lemon - sliced into wedges

DIRECTIONS:

Slice lemon, chop your chives and melt some butter!

Butter your rolls. Pour some of the butter on a plate and dip each roll in butter.

Steam your lobster. If you’re just using tails, you could either cut the tails open, remove the meat, slice it and sauté it in a pan with lemon, butter and garlic -OR- place on a baking sheet (in or out of the shell), covering the lobster meat with melted butter, lemon and a little freshly chopped garlic if you’d like. Roast in a pre-heated oven at 400 degree being careful not to overcook. Usually 8-12 minutes depending on your oven. The lobster is done when the meat is white and no longer translucent.

Toast your rolls. A few minutes before your lobster is steamed or ready to be removed from the oven, place the rolls on a baking sheet and place in a 400 degree oven. Remove rolls from the oven when golden brown.

Now for the fun part, assembling our decadent rolls!

  • Place chopped lobster meat in the roll

  • Add a squeeze of lemon

  • A dash (or your desired amount) of Old Bay seasoning

  • Some fresh chives for the win

  • Finish with a drizzle more of butter

  • Enjoy! 🦞

Would love to connect with you on Instagram (@tammiweed) and Tiktok (@girlsgottoeat) too!

Butter Rum Cake

My mom has traditionally made this cake during the holidays (like many of you) but it’s such a family favorite, we request it all year round. It’s sure to be your new go-to dessert and when the rave reviews come in, tag me and let me know! ♥️

IMG_5932.jpeg

This heavenly Butter Rum cake couldn’t be easier to make!

NOTE: While this cake contains Rum alcohol, the alcohol cooks off and this cake can be enjoyed by the whole family. Rum extract may also be substituted.

INGREDIENTS:

1 Cake Mix (Butter Golden or Yellow)

Instant Vanilla Pudding, 1 small box

4 eggs

Water, 1 cup

Vegetable oil, 1/2 cup

Rum, 1/2 cup or 1/4 cup of Rum extract

Walnuts or Pecans, 1 cup (finely chopped)

Preheat oven to 350 degrees. Grease Bundt cake pan. Pour 1 cup of finely chopped nuts in the pan and set aside. In a large mixing bowl, add all remaining ingredients and mix until well combined. Pour batter into pan over the nuts and bake until done. Oven times vary but this cake should take about 45 minutes. Once the top is golden brown, do the toothpick test. If the toothpick comes out dry with a few crumbs or none at all, remove and let the cake cool.

THE GLAZE;

Butter, 1/2 stick

Rum, 1/2 cup

Water, 1/2 cup

Sugar, 3/4c to 1 cup

In a medium skillet, melt butter. Add water and sugar. Remove from heat and then add rum. If you need more liquid, add more water or rum. Return to a low heat. Whisk consistently until syrup turns white. Drizzle over cake and enjoy this heavenly cake!

A+ APPLE BREAD

applebread.JPG

This recipe comes from my Great Aunt Claire and it’s been a family favorite for YEARS! Let me know if you make!

INGREDIENTS:

  • 1 1/4 cup oil (vegetable or canola)

  • 3 eggs

  • 2 cups of sugar

  • 1/2 teaspoon of salt

  • 1 teaspoon of cinnamon

  • 1 teaspoon of baking soda

  • 2 teaspoons of vanilla

  • 3 cups of thinly sliced apples

  • 3 cups of flour

DIRECTIONS:

In a medium bowl, mix eggs, oil, vanilla and sugar until well combined.

Prep your apple slices.

Prep a second bowl with your remaining dry ingredients, flour, cinnamon, salt and baking soda.

Add your apples to your sugar batter.

Add your batter to your flour and fold until combined.

Grease two loaf pans, fill halfway and bake at 350 for 50-60 minutes.

Better Than Nothing Bundt Cake

Adjustments.jpeg

INGREDIENTS:

CAKE:

  • 1 box Ghiradelli Double Chocolate Cake mix (you could certainly use another brand of chocolate cake (Devil’s Food) but I think Ghiradelli is superior)

  • 1 package Godiva Instant milk chocolate pudding (or comparable brand)

  • 10 oz of Godiva semisweet chocolate chips (or comparable brand)

  • 1 cup whole milk

  • 3 eggs

  • 1 stick of unsalted butter, melted

  • 1/2 cup of sour cream

  • 1 tsp. pure vanilla extract

  • 1/2 teaspoon salt

FROSTING:

  • 1 stick unsalted butter

  • 1 package cream cheese (8oz)

  • 1 teaspoon vanilla

  • 1.5 to 2 cups of confectioner’s sugar (to taste)

DIRECTIONS:

  • Preheat oven to 350 degrees

  • In a mixer, add your eggs and beat until fluffy.

  • Add milk, sour cream, vanilla extract and salt.

  • Add melted butter and then quickly add the cake and pudding mix

  • Fold in the chocolate chips

  • Grease bundt pan. I like to use the baking spray with flour.

  • Bake at 350 for about 35 minutes. When I thought the cake was done, I put a toothpick in and removed the cake from the heat when the toothpick was not 100% clean. I removed it when I thought it could use another 3-5 minutes of baking.

  • Remove Bundt Cake from oven and immediately put in the freezer for an hour.

  • Frost and store in refrigerator.

FROSTING: Add butter, cream cheese, vanilla and sugar to a bowl and combine with an electric mixer.

My Family’s Meatballs

3E6C7CC5-1446-4D27-B492-FFDF4BB5001A.jpeg

Buon appetito!

There are a million ways to make an Italian meatball and every family has their own recipe and their reasoning behind why their meatball truly is the best. I’m not here to tell you our family recipe is the best because I’m sure there’s a little grandmother living in the Italian countryside who deserves that title more than we do but I will say, the group pictured above knows about meatballs. We make them often, we talk about them even more often and in Bobby Flay fashion, we throw down and compete against each other for “best meatball” bragging rights. All that to say, with permission from my Mama, we’ve decided to share our family’s meatball recipe. from our family to yours, buon appetito!

Joanie’s Meatballs:

Adjustments.jpeg

Level of Difficulty: EASY (Two steps: assembling the meatball and sautéing it). 

Prep Time: 25 – 30 minutes

Cook Time: 6-8 minutes sautéing and for as long as you like in your tomato sauce! 

INGREDIENTS:

1 pound of ground beef chuck (or if you prefer you can do 1/3 ground beef chuck, 1/3 veal and 1/3 pork but it’s not necessary). 

1 cup of Italian-seasoned breadcrumbs (not plain)

1 egg, beaten 

1 cup of grated sweet onion 

½ cup of minced parsley (you should see the green flecks throughout the mixture)

1 clove minced fresh garlic

½ cup of Pecorino Romano cheese, grated

½ cup of whole milk

1 teaspoon of salt -OR- garlic salt and black pepper

Adjustments.jpeg

DIRECTIONS:

In a large mixing bowl, add your meat, your breadcrumbs and so on. We add it in the order of the ingredient list. The most important thing is to make sure the ingredients are mixed together well.

Now, we’re ready to roll! We try to get 12 meatballs per pound. For reference, try to roll yours slightly smaller than a golf ball. Keep your meatballs compact and uniform. 

In a large skillet, heat 1 cup of olive oil on med-high. Once at the med-high heat, add one meatball. If the oil sizzles, you’re good to add the rest of the meatballs. Just make sure you’re not overcrowding the skillet as you will need room to turn them. Depending on the size of your  skillet, you should be able to fit 8-12 meatballs in one skillet or saute pan. 

In terms of doneness, our general gauge is 3 minutes per side. We want to make sure there’s a nice brown crust on your meatball. 

Once your meatballs have been turned you can add to your sauce or let them cool and freeze them for future meals.

Adjustments.jpeg

Jodi’s Cauliflower Nachos

My new favorite and so easy to do!

INGREDIENTS:

1 head of cauliflower

1 can of black beans

3/4 cup of Red Hot (adjust based on preference)

Season to taste with Badia Taco Seasoning, garlic salt and pepper.

Shredded cheese, 1-2 cups

Toppings: Tomatoes, avocado, sour cream, fresh cilantro

DIRECTIONS:

Coat cauliflower with red hot, taco seasoning, garlic salt and pepper.

Place in air fryer for 12 minutes at 400 degrees or in oven at 425 until tender.

Remove from fryer/oven, top with tomatoes, avocado, sour cream and fresh cilantro.

Texas Caviar Quesadillas

Quesadillas just leveled up! They’re the easiest thing in the world to make and so delish!

Adjustments.jpeg

INGREDIENTS:

FOR TEXAS CAVIAR:
1 can of black beans, rinsed and drained

1 can of corn, drained

1/2 red onion, diced

1 red bell pepper, diced

2-3 Roma Tomatoes, diced

1 jalapeño, diced

3 garlic cloves, minced

1/2 cup of cilantro, finely chopped

1/2 cup of Italian Dressing (add more as desired)

Season to taste. I added salt and TAJIN! I think TAJIN is key!

Adjustments.jpeg

Once you have your caviar, you’ll want to eat some of it with tortilla chips I’m sure. Go ahead. I top it with a little sour cream too.

Adjustments.jpeg

Now for the fun part. You can do this day of or day after. I don’t like storing it longer than that but you do you!

INGREDIENTS FOR THE QUESADILLAS
Tortillas (your choice)

Chicken (I used Rotisserie but you can make your own)

Shredded Cheese

Toppings of your choice (sour cream, salsa and cilantro are mine)

DIRECTIONS:

On a medium heat, spray or lightly oil pan.

Add the tortilla

Add some shredded cheese

Once the cheese has melted a little, add your caviar and chicken.

Flip to brown both sides.

NOTE: I was cooking for one so I used one tortilla and added cheese to one side but the easiest way is to top the caviar and chicken with a little more cheese and add another tortilla. Flip to brown both sides. Cut into four pieces.

You can top it with more Texas caviar or whatever else you’d like!

Hall of Fame Zucchini Bread

This is certainly one of the best baked goods I’ve ever tasted! This recipe comes via my mom via my great Aunt Angel who inspired my mom to cook and taught her much!

IMG_9257.jpeg

Yield: 2 Loaves
INGREDIENTS:

3 Eggs

2 cups of sugar

2 cups of flour

1 cup of vegetable oil

2 teaspoons of cinnamon

2 teaspoons of Baking Soda

1/4 teaspoon of Baking Powder

1/4 teaspoon of Salt

1 teaspoon of vanilla extract

2 cups of grated zucchini-packed tightly

1 cup of walnuts

IMG_9256.jpeg

Directions;

Preheat oven to 350 degrees.

Beat eggs, add sugar. Mix well.

Add oil and zucchini.

Add dry ingredients.

Add vanilla and nuts.

Grease two loaf pans filling each halfway.

Bake for an hour or until done.